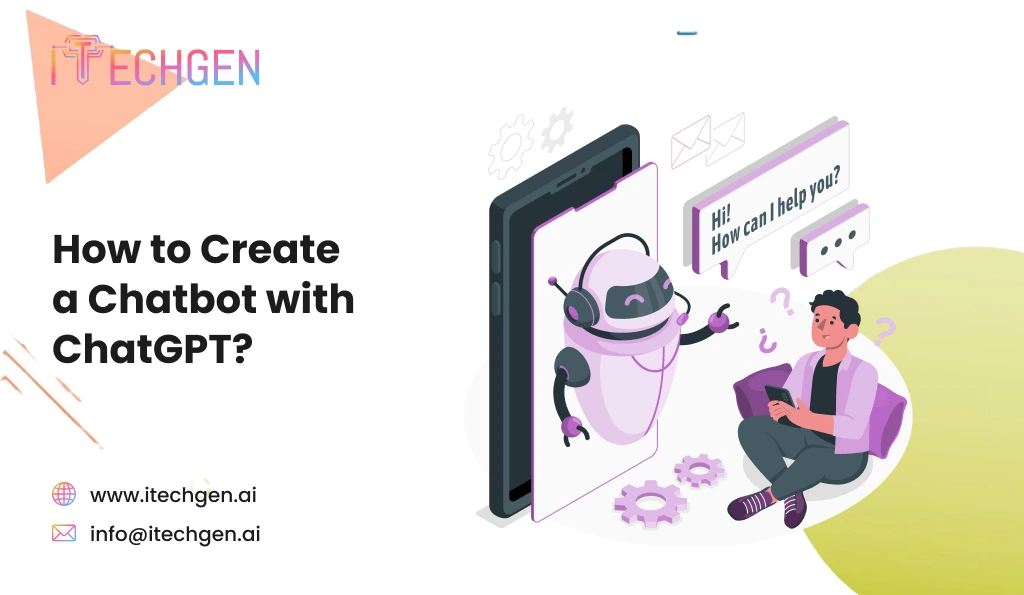
AI tools have made our professional lives so much easier by simplifying tasks and enhancing efficiency. From Chatbots talking as a human to tackling customer queries to ChatGPT resolving our complex queries, AI has transformed how businesses operate.
But, did you know that you can do much more with AI tools than just chat or research?
As a leading AI tool, ChatGPT can even be used to generate texts, images, and videos. In a broader sense, it can be used for coding, planning, writing, and analyzing data as well. Enabled with deep learning and language processing abilities, it can perform various specialized roles based on your requirements. For instance, in businesses, it can be used to create automated chatbots to provide accurate information to clients without having to do it manually. Yes, you got that right – no coding required!
Powered by Open AI, which is an advanced generative pre-trained transformer (GPT), its application programming interface (API) allows you to generate your automated chatbot to answer your clients’ questions and queries. This helps streamline customer interactions effortlessly. And, there are several other benefits in the line:
ChatGPT offers several benefits that make it a great choice for building chatbots, including:
Can’t wait to give it a try?
Well, before we tell you how to create a chatbot with ChatGPT, you must know the key functionalities of OpenAI API. It was designed to create and train your own AI models and implement AI features within other applications.
However, unlike the free ChatGPT version running on GPT-3.5, the OpenAI application programming interface (API) does cost money. To do this, you’ll need to get a ChatGPT Plus or an Enterprise account that allows you to integrate the API into your application.
FYI, while the former will cost you about $20 a month, an enterprise solution like a ‘Pro’ or ‘Team’ plan is $200 and $25 per month respectively. You can choose the plan depending on your needs.
Now, once you’ve upgraded to a Plus, Pro, or Team plan, you can start creating your chatbot, easy-peasy!
Before we embark on the technicals of how to create a chatbot using ChatGPT, it is necessary to ensure the purpose and target audience of your chatbot.
Also Read: The Cost of Implementing AI in Healthcare
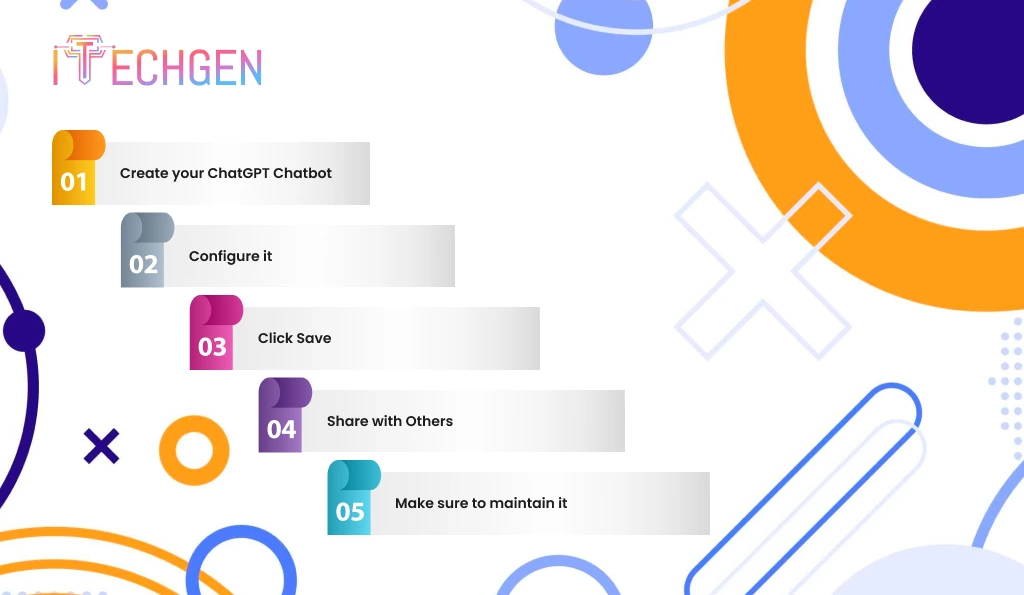
By following these simple steps, you can create a Chatbot with ChatGPT for your company in no time. Here we begin:
Once you have created your account on ChatGPT, you will be redirected to its homepage. On the home page, on the left-hand side of the navigation bar, you’ll find “Explore GPTs.”
Click on that, and you will be presented with an option called “Create a GPT” or “Customize a version of ChatGPT for a specific purpose.”
Press on that, and you will be directed to an interactive GPT builder page. Meaning, that all you need to do is submit a series of prompts to the GPT builder to guide the model on what your chatbot should do.
For instance, if you want to build a customer support chatbot, then you may type “Build a customer support chatbot to manage (XYZ) business.”
Depending on your business niche, the GPT builder will either generate a name for your chatbot or ask you to enter one.
You can suggest any name you deem fit to represent your business.
Next up, it will generate a profile picture for the bot, which you can accept or change.
After selecting a name and profile picture for your chatbot, you can start giving it the tasks that you want it to accomplish. This includes all the information that you want your chatbot to be able to provide to your customers.
Once you outline the tasks and instructions, the builder might ask you if you want to refrain the bot from answering any specific questions. For example, if you don’t want it to make any promises on your products or services, you can instruct it to do so.
And done! Your automated chatbot is now ready to be tested and go live.
All you need to do is click on the preview panel on the right side and test your bot by asking certain questions that are relevant to your business.
To add anything, you can further continue to customize it using simple prompts.
On the main GPT builder page, you will also find the option “configure.”
Using it, you can, at any time, configure or change the features and settings of your chatbot including its name, picture (using DALL-E integration), and task-related instructions.
Moving on, once you click on configure, you will be redirected to the settings page, which will already be stuffed with the commands or instructions that you had given your chatbot initially.
To change or modify any information, you can click on a particular field or even add new conversation starters related to your products and services.
Using advanced settings, you can also upload a variety of data sources such as blogs, charts, and other types of documents to further allow your bot to enhance its ability to provide relevant information.
Or you can enable the code interpreter feature to let it code, analyze, and solve complex calculations.
“Create new action” at the bottom of the settings page is yet another advanced feature that allows your chatbot to perform roles that are beyond the scope of ChatGPT.
No matter what you do, always remember to hit save, especially when you make any changes or additions to your automated chatbot.
To do that, locate the “Save” button on the top right-hand corner of the navigation bar and click on it.
As soon as you click on the dropdown save button, you will see three options- “only me,” “only people with a link,” and “public.”
Choose the desired option depending on whom you want your chatbot to be accessible to and hit confirm.
After successfully saving the bot, it will be visible on the home page in the left-hand navigation bar for further use or modification.
Apart from selecting the accessibility, you can also share your automated chatbot with others using a link.
Just copy the link from the ChatGPT homepage, and share it with anyone you like over the internet.
Last but not least, once it is all set up and done, you may have to edit or update your chatbot from time to time. Especially, if you have some new products, services, or information to add.
As we mentioned above, you can easily change or add any feature or functionality of your chatbot at any point in time.
Just like how we started, all you need to do is click on the “Explore” button on the left side navigation bar and choose your GPT from under “My GPTs.”
If you have multiple GPTs, then choose the one you want to edit or update by clicking on the pencil icon right next to it.
And now, the same thing again, as it will take you to the GPT builder page with the option to create and configure.
To create another chatbot, you can click on create, and to modify an existing one, simply click on configure. It will take you to the settings page where you can change, add, or delete, any feature or functionality of your chatbot as per your needs and business trends.
Speaking of which, you can also delete the entire chatbot from your ChatGPT app by clicking on the three dots next to the bot just beside the pencil icon.
Once you click on the three dots, a pop-up option with “Delete GPT” will appear. Click on that and done, your automated chatbot will be no more.
Apart from this coding-free procedure, ChatGPT also allows users to code and create their chatbot manually. However, it is much more technical and requires sound knowledge of programming or coding.
Read More: ChatGPT vs Microsoft Copilot

Pankaj Arora is the Founder & CEO of iTechGen, a visionary leader with a deep passion for AI and technology. With extensive industry experience, he shares expert insights through his blogs, helping businesses harness the power of AI to drive innovation and success. Committed to delivering customer-first solutions, Pankaj emphasizes quality and real-world impact in all his endeavors. When not leading iTechGen, he explores emerging technologies and inspires others with his thought leadership. Follow his blogs for actionable strategies to accelerate your digital transformation and business growth.
View More About Pankaj Arora